I don't particularly care for how Han and Leia look here.
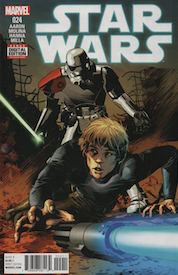
The Rebels, having taken command of Imperial Star Destroyer Harbinger in an effort to break the blockade of Tureen VII, are finding the truth of Spock’s advice to Stonn: having is not so pleasing a thing as wanting. It turns out running a star destroyer with a couple hundred people isn’t easy. Their one good engine is about to go out, the shields are failing and the ion cannons are offline, and the “food court” on the thing is nothing but a Chick Fil A and a cookie place. They’ve been on high alert ever since their admiral came to meet them strapped to the front of his transport and now Luke and Sana are investigating the disappearance of a maintenance team that was sent to fix the weapons. With less than an hour before they arrive at Tureen, Leia is unwilling to stop the ship. Luke and Sana find evidence of a firefight but no sign of the maintenance team. Suddenly and simultaneously, SCAR Squad strikes. Luke is cut off from Sana and their team, there are explosions on the bridge and in the engine room where Chewie and the droids were working, and Sana’s team find themselves under fire and pinned down. Luke is confronted by Sgt. Kreel, who invites him to demonstrate any improvements in his lightsaber skills since they last met. On the bridge, Leia stays the course. Chewie fights off his assailant in the engine room. One of Sana’s team has the bright idea to pop an airlock; Sana is the only one who thinks to hold onto anything since she is the only one without a mask. Outside the ship, SCAR Squadmembers fighting Rebel soldiers are joined by TIE fighters. The ship has reached Tureen VII. Han, flying the Harbinger, uses it to sideswipe the two destroyers participating in the blockade. The Imperials are unaware that the ship is in enemy hands. Sgt. Kreel tells Luke that SCAR Squad could have destroyed this ship anytime they wanted, but they haven’t. Why? He tells Luke he can ask his boss about that just as Vader’s TIE appears in the midst of the battle outside.
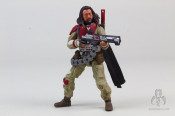
If SCAR Squad is really that good, Sana shouldn't have had time to do this before Sharpy shot her in the back of the head.
So everybody’s got their own little side battle going with different members of SCAR Squad. R2 is actually remotely battling the slicer guy (I know all their names but I don’t know which one’s which) to keep him from gaining control of the ship; while Sana, lurking above, pounces on him, kicks him into an escape pod, and launches it away. Now, Slicey’s partner the “melee guy” with all the knives (I think his name is Sharpy) is about to shoot Sana when she goads him into giving her a fighting chance. Now, common sense says that in a combat situation you probably shouldn’t arm your enemy just to have a chance to prove how awesome you are; but common sense isn’t always right. For example, common sense tells me that the bigger and heavier a vehicle is, the easier it should be to drive it drunk. This is why I no longer have a job shuttling seniors to the riverboat casino. So, he gives her an electro club and agrees to fight her on equal terms. Back on the bridge, Leia and Han are barely holding out and it looks like their mission to deliver relief supplies will fail. Luke and Kreel are still having their lightsaber battle while Vader is in communication with the sergeant, telling him not to injure his prize. Kreel just about has Luke beaten when Skywalker summons a strong Force push that knocks Kreel back and causes a large container to land on his left arm. Down in the engine room, Chewie throws his guy against the reactor control board and the resulting electrical surge causes the reactor to power back up. Luke gets the cannons back online and Sana flushes Sharpy out an airlock after disabling his jetpack with the electro club he gave her. Luke heads to his X-wing and helps take out the two moon bases. Leia orders escape pods with the crew and relief supplies to be launched. Kreel gives the squad permission to blow the ship and the guys assaulting the bridge set it to blow. With no other means of escape, Han uses a thermal detonator to blow a hole to the outside and he and Leia escape to the comfort and safety of open space. It’s okay, they have masks. Man, a lot of people in this story just end up floating in space. Maybe that’s why I didn’t mind the Leia thing in TLJ, I was desensitized to it by this. Sgt. Kreel has to amputate his arm with his lightsaber to get off the ship, Sana and Chewie pick up Han and Leia in the Falcon. Artoo takes an escape pod. After the battle, Vader is getting ready to express his disappointment in SCAR Squad, presumably by murdering them, when Kreel says that even though they did suffer some losses today they didn’t come away empty handed. SCAR Squad has captured C-3PO (he made the mistake of not wanting to wait for R2 and got lost on his way to the hangar). Yeah, See Threepio; that’s a totally adequate replacement for the Force sensitive Jedi prodigy Chosen One who blew up the Death Star. Anyway, we’ll see where this goes.
Note: Issue 25 includes a backup story entitled Droid Dilemma by Chris Eliopoulos & Jordie Bellaire and in memory of Kenny Baker. In it, Luke tells R2 to get the X-wing ready for an urgent mission. Artoo is hampered by encounters with various droids around the base. It’s a cute story and features, not one, but three different Gonk droids as well as other familiar droids from the Original Trilogy.
Review (Part II)
Gonk. Gonk.
And so the Last Flight of the Harbinger is concluded. These final two issues of the story were not easy to summarize. They are very busy. A lot of stuff happens quickly; maybe too much stuff too quickly. I think the story reads better first hand than comes across in my summary. There are some places where the action is not conveyed as clearly as it should be. For example the part where Sana launches Slicey in the escape pod: it was only with additional research that I learned he wasn’t already in the escape pod. I thought she dropped down and kicked Sharpy out of the way to get the drop on Slicey. Still, the story flows pretty well. The art is not that bad except, as I mentioned last week, it can be a too “cartoony” at times. This is especially true of how he draws Leia and Han as evidenced in the image above. In fact, it’s practically just with Leia and Han that this happens. The story itself is not bad, the premise is intriguing and fairly well executed. You get a resolution to the whole Harbinger plot but with strands leading into the next storyline involving Threepio’s capture. Sana is well used in this storyline; unfortunately, after the initial space battle to capture the ship, we see nothing of Wedge. That’s frustrating. I said in a comment last week that I think this might be the high point of Jason Aaron’s run on this book (not counting the Vader Down crossover). At this point I maintain that opinion. That’s not to say that it’s perfect; but its good outweighs its flaws. The good? The gang’s all here, a different threat besides just Vader and/or Boba Fett/other noted bounty hunter, good (if not always well presented) action scenes, good dialogue (especially between Han/Leia and Luke/Sana), some really nice covers in the single issues. The bad? Not enough Wedge, maybe tried to wrap it up a little too quickly in the end.